Cuban Flan

One of my favorite childhood desserts is flan. Flan is the cake of the Cuban
home. At birthday parties, dinners, holidays, barbecues, or any week night
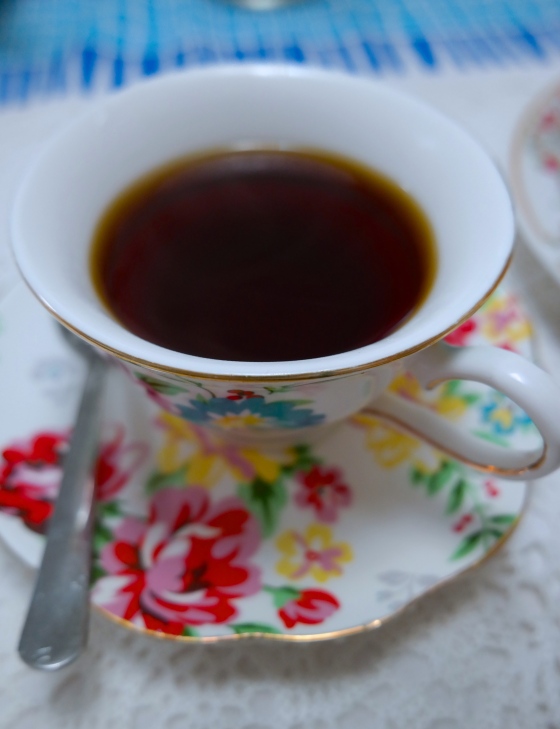
dinner, flan is present. This dessert is refined yet, casual. Its flavor profile is robust enough to stand up to a perfect cup of espresso and delicate enough for a hot cup of tea. This recipe is simple and easy. Aside from it being delicious, it also whips up in a flash. The best part? There are only 5 ingredients, and very minimal prep time, and it’s an easy make ahead dessert. Enjoy!

For the caramel:

1 cup white sugar
1/3 cup water

In a pan, combine the two ingredients and mix slowly until all the sugar is wet. Do not stir. Stirring will cause the sugar to crystallize and will not turn into a caramel. Let the sugar cook at medium high heat until it turns a light amber color. Be careful not to over cook it. Once it reaches the amber color, it will cook faster and it will burn. This will make your coating bitter. Pour into a mold and swirl around until the sides are coated. Let it sit to cool.

For the custard:

6 Eggs, at room temperature
1 can of condensed milk
1 can of evaporated milk
1 tsp vanilla extract
Pinch of salt, if desired

Preheat your oven to 350º degrees.

In a bowl or in a blender, add all ingredients together and whisk or
blend until all combined. Pour into the prepared mold and cover with
aluminum foil. Place the mold in a Bain Marie* (water bath) and bake for about 45 minutes to an hour, or until a toothpick inserted in the middle comes out clean. Allow it to cool before refrigerating. Once cool, refrigerate for at least 4 hours before serving.

To serve, run a warm knife along the edges to loosen and flip over
onto a platter with tall edges. The flan will have a lot of caramel
sauce, so having a serving vessel with edges will keep the rich sauce
around the custard. Enjoy!

*Bain Marie: To make a water bath, place the mold in a roasting pan or
any larger pan and add hot water in it. This will build steam inside the
oven and will be a gentler way of cooking the custard.

Warning: This dessert is highly addictive. People have been known to eat many slices at one sitting . Some have even eaten a whole flan… You are welcome! 🙂 

~Ana

Watercolor Birthday

Hello all! I am back! I took a little time off for the summer for some family travels and a move! We are now semi settled in our new house and I think it’s time to resume to regular posting. I sure do miss my sweet blogging friends! That includes you, yes, you reading this post! Glad you are here!

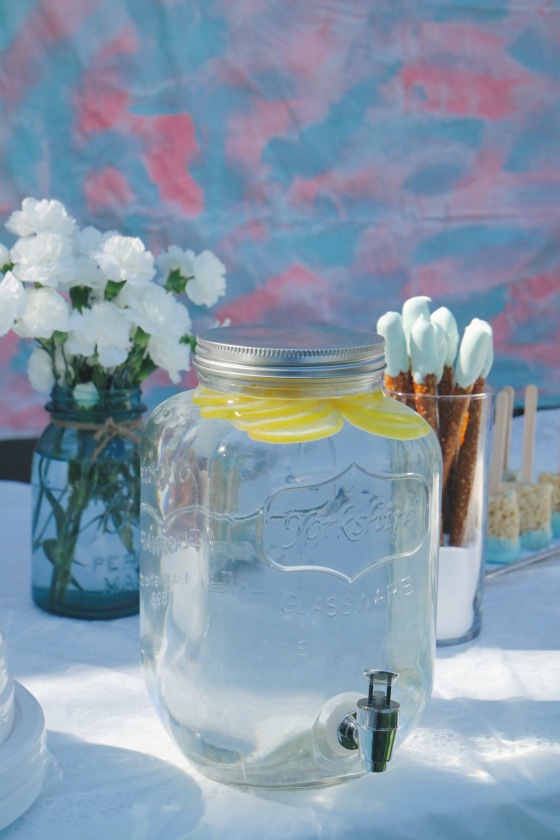
Yesterday celebrated our daughter’s 10th birthday! Double digits, you guys! To celebrate, we had a watercolor theme birthday bash in our front lawn. We invited 12 of hers and our closest friends. The weather was a perfect 75 degrees, sunny, and breezy. This was pretty much a DIY all the way. We wanted a peach and sea foam green color scheme, but had so much trouble finding those colors, that I had to make pretty much everything myself. I started early on last week so I would not be going crazy at the last minute. One trick to keeping your sanity, is to push to your party to a later part of the day. By having an early afternoon party, I was able to prep and set up (with the help of my D.H. and some  friends) all before guests arrived. Here are some pics of the celebration. Enjoy!

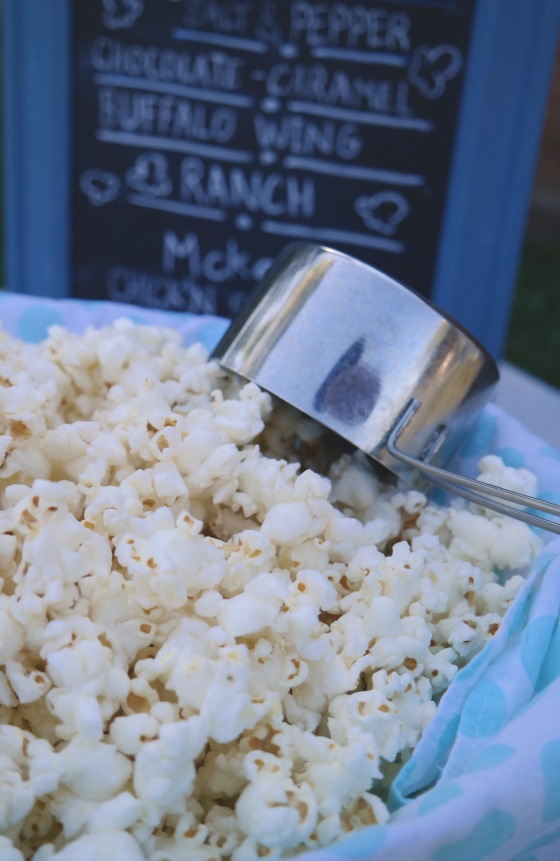
We had a popcorn bar with different kinds of toppings. Who doesn’t love popcorn?

SAMSUNG CSC

SAMSUNG CSC

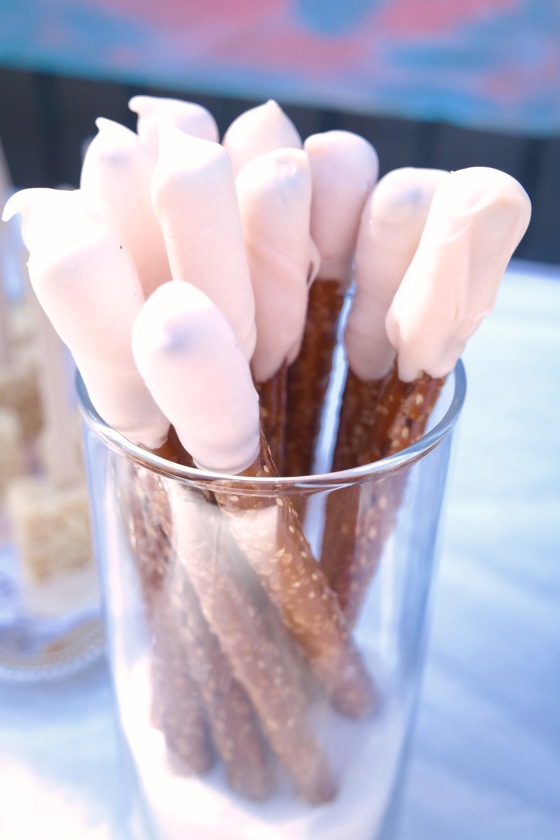
Pretzel “paint brushes”

SAMSUNG CSC

SAMSUNG CSC

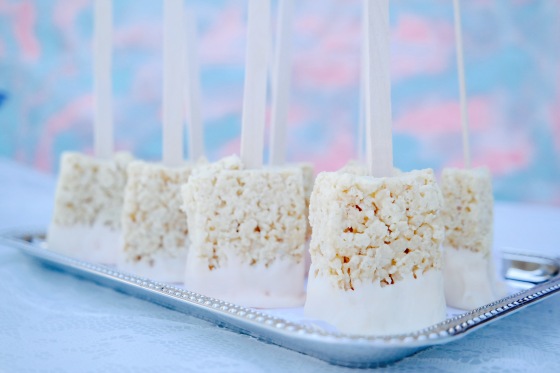
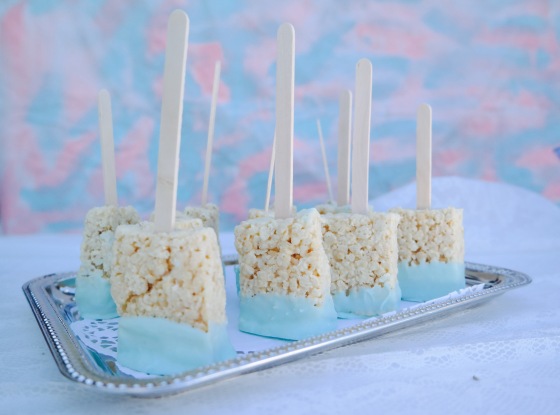
Rice crispy treats “paint brushes”. How clever is this?

SAMSUNG CSC

SAMSUNG CSC

SAMSUNG CSC

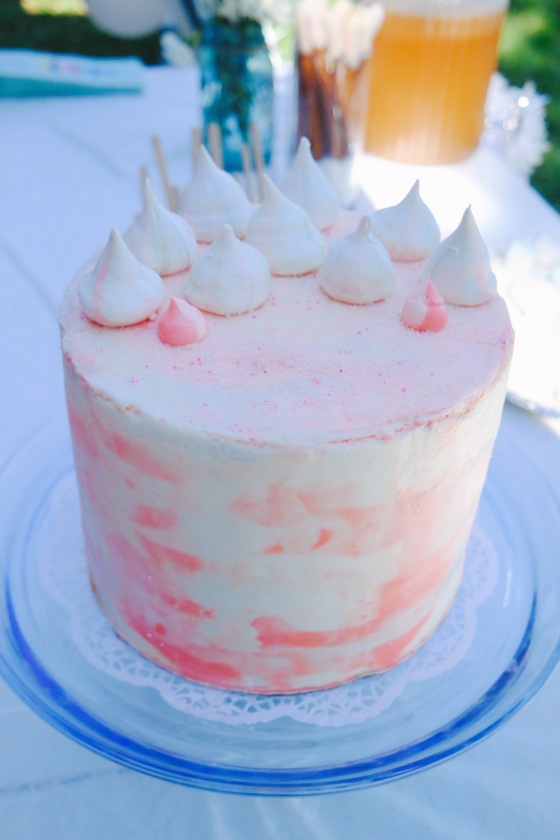
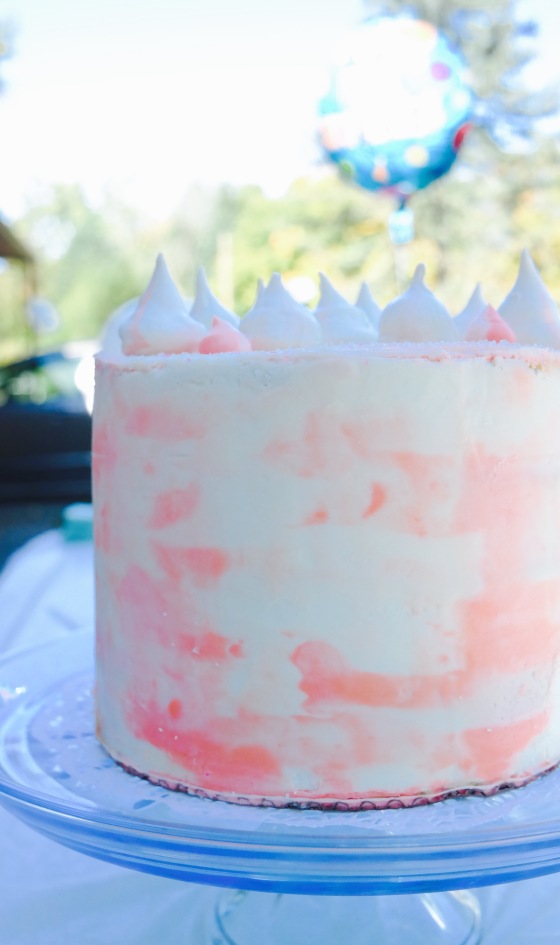
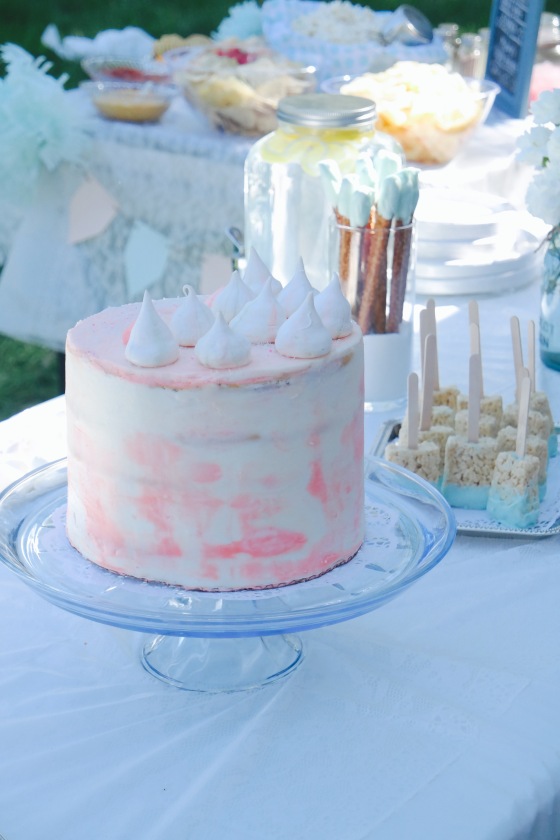
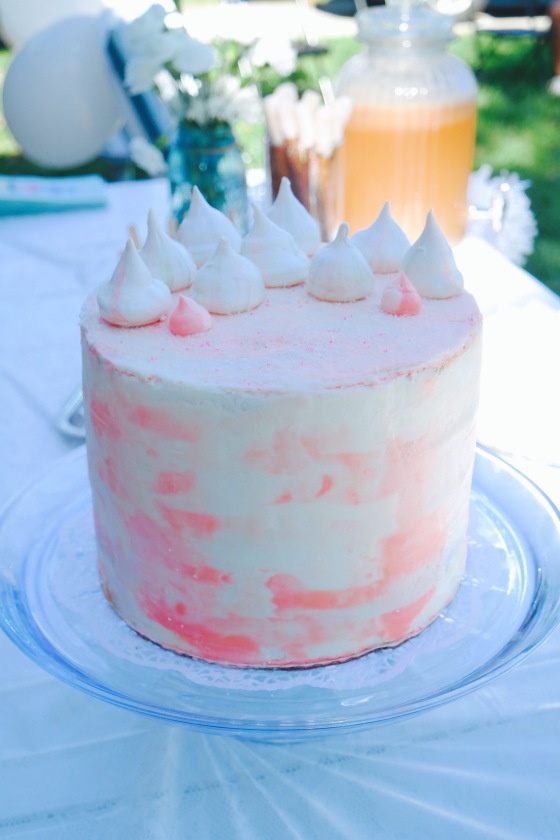
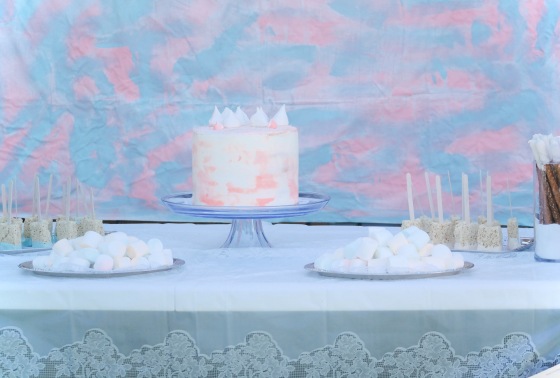
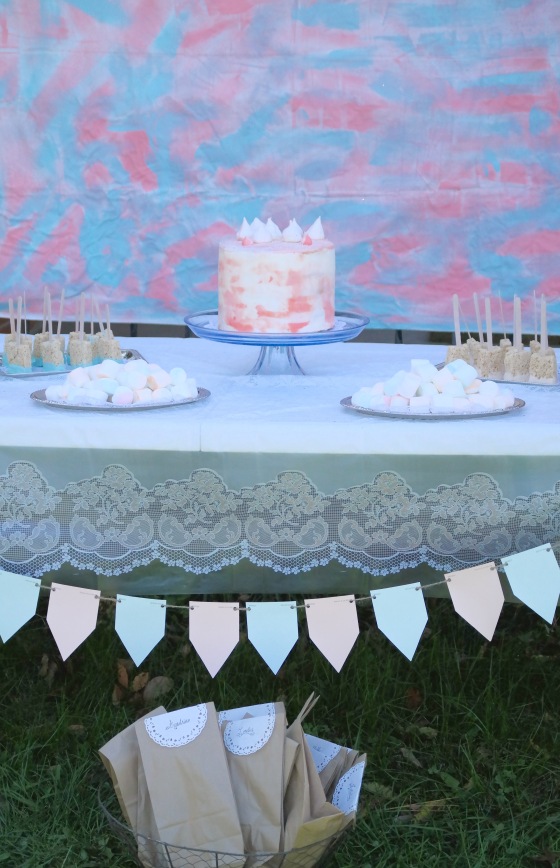
The cake was so fun to make. It was a mud cake with dulce de leche cream filling and vanilla buttercream frosting. I used different shades of buttercream to achieve the “watercolor” look. I also made meringue kisses for the top decorations. How adorable is this?

SAMSUNG CSC

SAMSUNG CSC

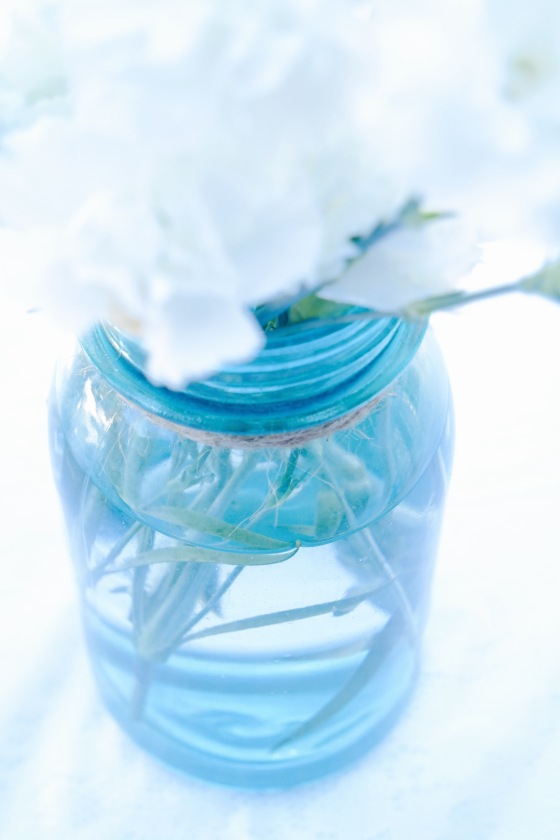
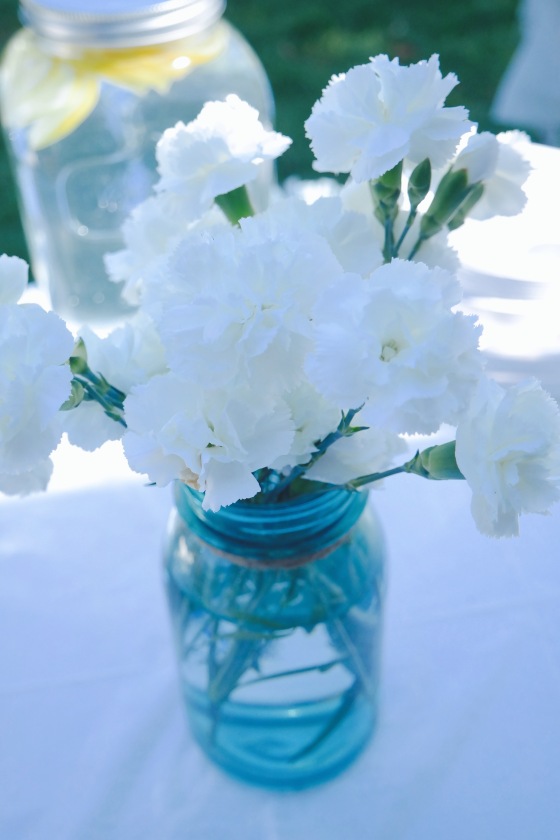
Fresh flowers are always a favorite!

SAMSUNG CSC

SAMSUNG CSC

SAMSUNG CSC

SAMSUNG CSC

Watercolor marshmallows were another party favorite.

SAMSUNG CSC

I made this bunting with paint swatches and the background was a painted sheet. So fun and so pretty!

All in all, we had a great time. Fun was had, yummy goods were eaten, hearts were filled, and memories made. I call that success! 🙂

Hugs,

~Ana

Sharing with:

http://www.dwellings-theheartofyourhome.com

http://joylovefood.com

http://www.oursouthernhomesc.com

http://apeekintomyparadise.com

http://cherishingasweetlife.blogspot.com

http://www.loulougirls.com

http://www.thededicatedhouse.com

http://katherinescorner.com

http://adventuresofmel.com

Summer Afternoon Tea Extravaganza

Last year my mom and I started a new tradition to host a summer afternoon tea. A few weeks ago we celebrated our Second Annual Summer Afternoon Tea Extravaganza.

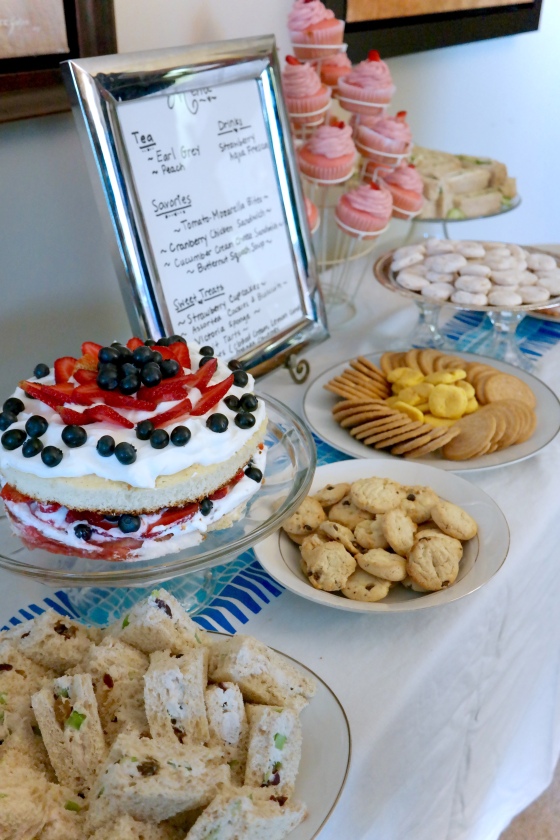
We hosted twenty of my mom’s closest friends and family and served a multi course meal which included soup, sandwiches, desserts, biscuits and cookies, and a variety of teas. We set the table with my mom’s white china and used mismatched floral tea ware for a more informal feel. For centerpieces we used daisies in thrifted tumblers and added taper candles in glass holders for a classy look. We also set out hats on the chairs for the guests to wear. So much fun! Here are some pictures for you to enjoy!

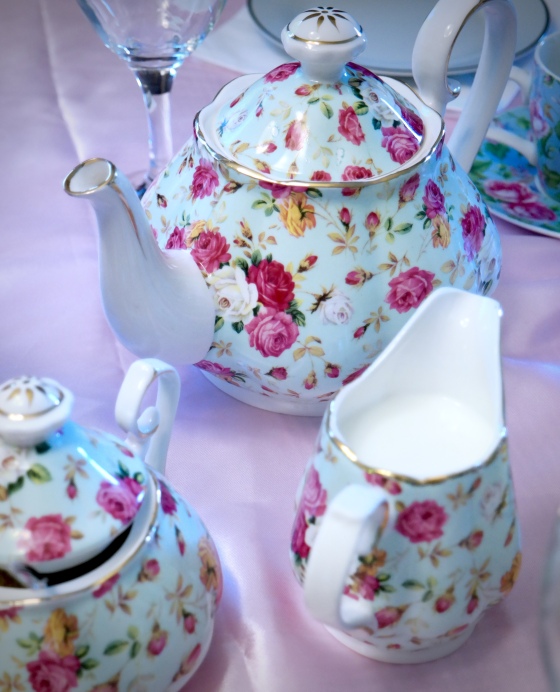
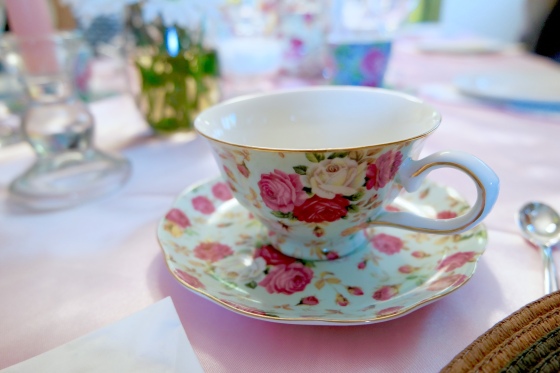
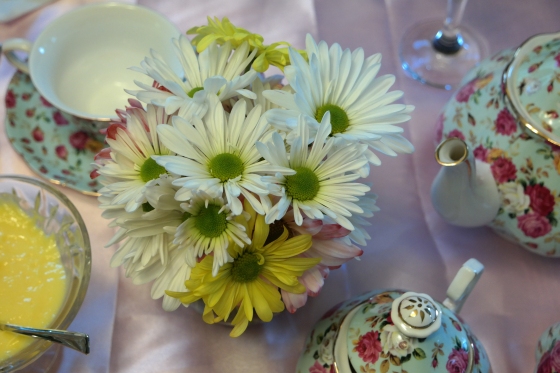
We used the Chintz pattern set I gave my mom for Mother's Day.

We used the Chintz pattern set I gave my mom for Mother’s Day.

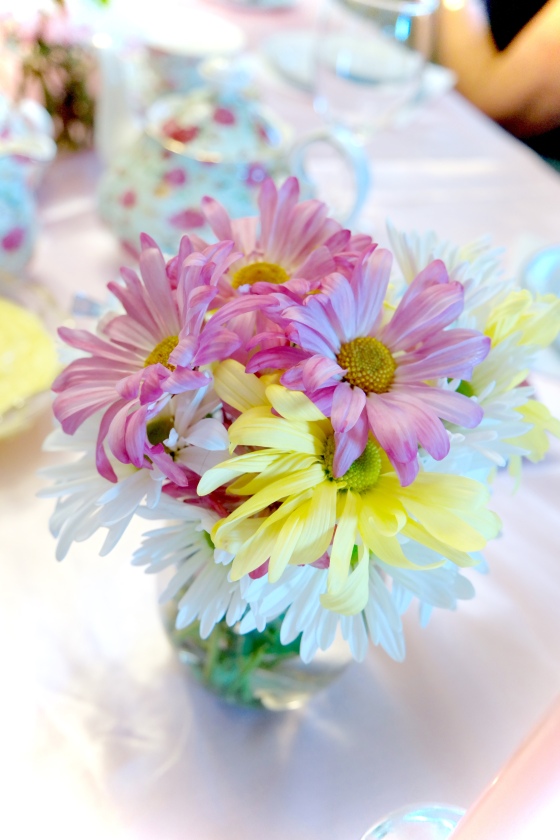
Fresh daisies adorned our table

Fresh daisies adorned our table.

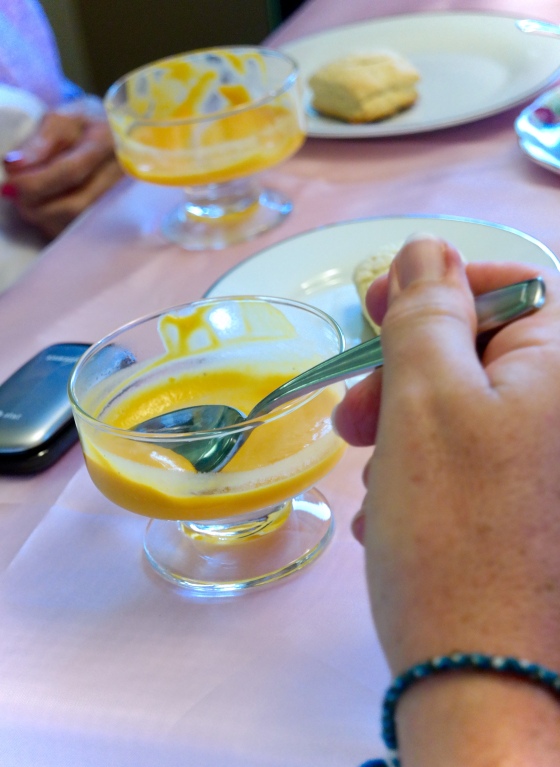
My mom made her delicious Roasted Butternut Squash Soup, which is always a crowd pleaser.

My mom made her delicious roasted butternut squash soup, which is always a crowd pleaser.

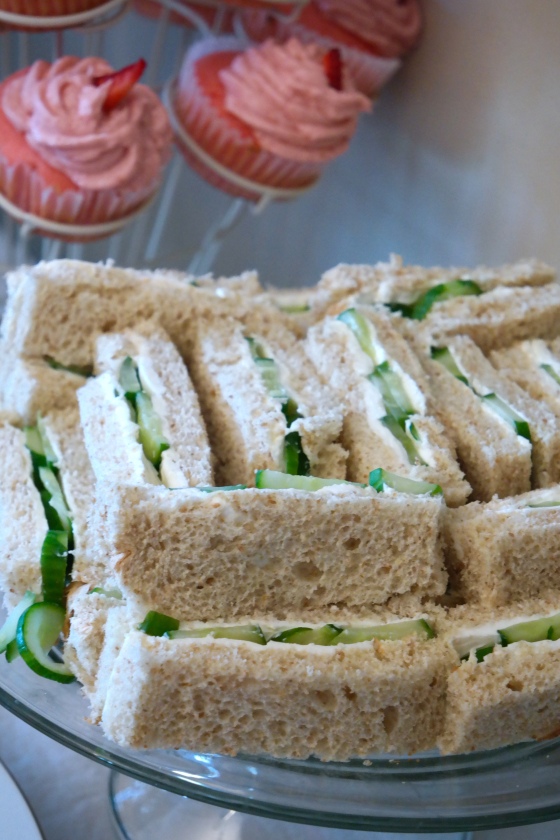
Traditional cucumber sandwiches are always a favorite.

Traditional cucumber sandwiches are always a favorite.

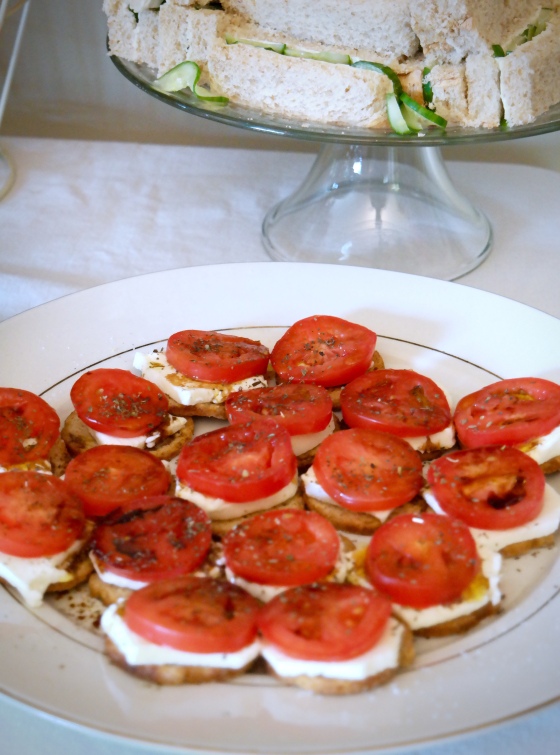
These open faced Mozzarella-Tomato bites were delish!

These open faced mozzarella & tomato bites were delish!

For dessert we had an assortment of biscuits and tea cookies as well as fruit tarts and other yummy treats.

For dessert we had an assortment of biscuits and tea cookies as well as fruit tarts and other yummy treats.

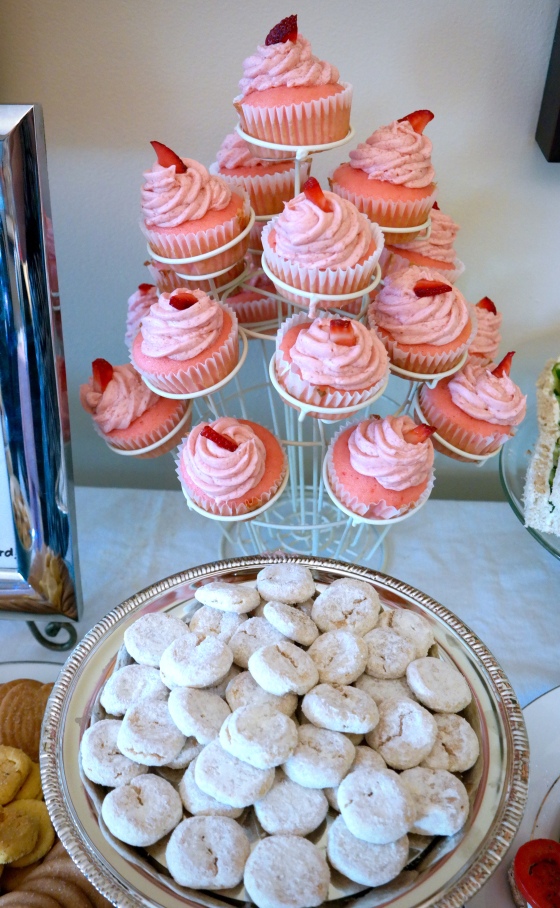
I made delicious fresh strawberry cupcakes.

I made delicious fresh strawberry cupcakes which my sister in law decorated so beautifully.

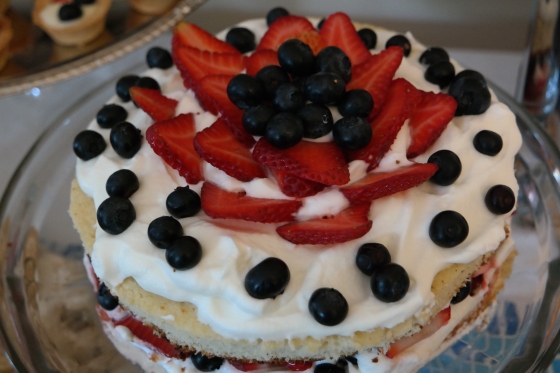
My 9 year old made her very own Victoria Sponge with fresh berries and whipped cream topping.

My 9 year old made her very own Victoria Sponge with fresh berries and whipped cream topping.

We had a wonderful afternoon together laughing, eating, sipping tea, and enjoying each other’s company. There really is no better way to enjoy an afternoon than in the company of those you love and hold dear. Truly, life is better with friends and tea, of course! We can not wait to do this again next year.

Enjoy!

~Ana

Sharing with:

http://apeekintomyparadise.com

https://wordpress.com/read/post/feed/35599532/764830955

http://theenchantingrose.blogspot.com

http://julieslifestyle.blogspot.com

http://sandimyyellowdoor.blogspot.com

Inspiration Monday #2

While on vacation in Florida, we visited the zoo. What a nice way to spend the day! While my husband was out fishing with my brother and a friend, my sister in law and I packed up the kids in the car and headed out. It was a blistering hot day but the kids really enjoyed the visit to the zoo. I too, had a wonderful time photographing the flora and fauna on exhibition. I was really inspired by the vibrant colors of the blooming flowers and the animals. Louis Armstrong said it best in his song about the beauty of our world… I see trees of green, red roses too, I see them bloom, for me and you. And I think to myself, what a wonderful world!

What’s inspiring you?

~Ana

Sharing with:

http://www.dwellings-theheartofyourhome.com

Cooking with Kids

Hi friends! I have surely missed all of you! Sorry that I have been MIA. I have been traveling for the past few weeks. I will be in and out for the next few weeks as I will still be traveling but I will try to post as often as possible. Aside from traveling, I  have also been busy wrapping up some projects.

One of the awesome projects I worked on was  a summer cooking class for children ages 9 through 13. In the class, I introduced them to basic cooking skills using fruits and veggies. For our first class we made Roasted Tomato Soup and Apple Crisp.  The lessons included simple recipes that showcased techniques and basic knife skills. Their goal was to produce the two  recipes using techniques that we covered in class. I could not believe the results! I was amazed at how fast kids learn. They truly are little sponges, capable of absorbing incredible amounts of information! They produced the dishes with such skill and finesse! For homework, the kids were to reproduce the dishes all on their own for their families, at home.

One of the advantages of teaching this class was being able to have my daughter join me. She has been cooking with me since she was about 2 or 3 years old but it wasn’t until about two years ago that she became very interested in learning technique. I took the class as an opportunity to hone her skills and she loved it. I have found through the years that when you involve kids in the cooking process at home, they will be more likely to try the food they make and can even develop a love for cooking. I really enjoyed seeing her cooking all on her own. She was so proud of herself and her accomplishments! Her daddy and I were too. And of course, we got to enjoy the fruits of her labor.

These two recipes are great for kids and adults just learning to cook. They require minimal prep and very few ingredients,yet they are chock-full of flavor. Here it goes…

Roasted Tomato Soup

15 Roma tomatoes, quartered

1 Garlic head, pealed (whole)

3 tablespoons, Extra Virgin Olive Oil

3 teaspoons Italian herbs (seasoning)

1 1/2 teaspoons Salt (or to taste)

1/4 cup Heavy cream

1/2 cup water (or as needed to adjust consistency)

Directions:

1. Preheat oven to 450º F. In a large bowl, add the tomatoes, olive oil, herbs, garlic, and salt. Mix together until well coated.

2. In a roasting pan, spread the tomato mixture evenly and roast in the oven until soft. About 25 to 30 minutes.

4. Remove from the oven and carefully pour in a blender or food processor. Blend until smooth.

5. Pour into a large cooking pot, add water, and cook for about 3 minutes. Add the heavy cream and stir together to combine.

6. Add more salt, only if it needs it, one teaspoon at a time and stir to mix well.

7. On medium heat, allow soup to come to a simmer (it will be bubbling slightly) stir occasionally and once it comes to a simmer, turn off the heat.

8. Serve immediately and garnish with a side of crusty bread.

Apple Crisp

4 medium  Apples, thinly sliced

1⁄2 cup Brown sugar

1⁄3 cup All Purpose Flour

3⁄4 cup Oatmeal

1 1⁄2 teaspoons Ground Cinnamon

1⁄3 cup Butter, softened

Directions:

1. Preheat oven to 350ºF. Spray a square baking pan with cooking spray or grease it with butter; place sliced apples in bottom of pan.

2. In a medium bowl, mix together brown sugar, flour, oatmeal, and cinnamon.

3. Stir butter into sugar mixture until crumbly.

4. Sprinkle crumbly mixture over the apples.

5. Bake 30-40 minutes or until fruit is tender and top browns.

The pictures are my daughter’s finished dishes. She did a great job! Don’t you think? I hope you and your kiddos try these recipes. They are a great way to introduce your child to the world of cooking. If you do try them, write me a comment. I would love to know how you all liked them!

Enjoy!

~Ana

Sharing with:

http://romantichome.blogspot.com

http://ivyandelephants.blogspot.com

http://katherinescorner.com

http://jannolson.blogspot.com

http://adventuresofmel.com

http://apeekintomyparadise.com

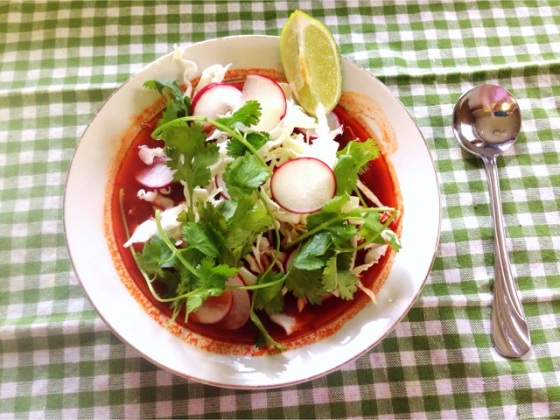
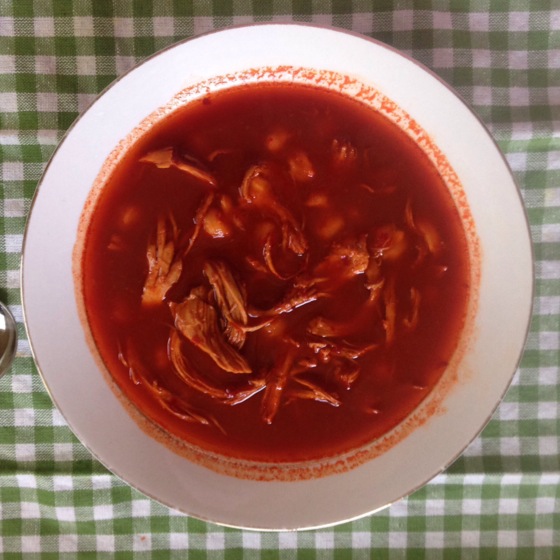
Pozole (Mexican Corn Soup)

91a35c99-aa7b-4ca2-9359-35c4a59e82d8

Pozole is a Mexican soup that is made with hominy, dried chilies, meat, seasonings, and garnishes. It is a delicious brothy soup that can be consumed all year round. At home, I make this soup quite a lot and it is always a favorite. Most of the time I make it vegetarian but every now and then, I use chicken breasts. The vegetarian version is yummy too. Regardless of the version you choose, I promise you will love it. The spice is just right and the crunchy garnishes add great texture. If you are looking for a soup that is exciting and full of flavor, then this is the soup for you!

Pozole

3 chicken breasts, cubed or any meat of your choice (I use vegetarian fry-chick from Worthington or regular chicken breast)

9 dried Guajillo chilies

1 small onion, diced

3 cloves of garlic

1 bay leave

1 tsp cumin

Salt to taste

3 cups of cooked hominy (canned is fine too)

Water or chicken stock as needed

FOR GARNISH:
Shredded cabbage
Sliced radishes
Cilantro
Lime wedges

DIRECTIONS:

In a small pot with hot water ( about 4 cups) place the garlic and guajillo pepper. Bring to a boil. Turn off the heat and let the peppers sit for about 20 minutes or until they rehydrate. While the peppers are getting plumped, work on your soup base and garnishes.

For the soup:
In a pot, on high heat, add some oil and brown the meat (seasoned with salt). Once the meat is seared, reduce the heat to medium high and add the onion, bay leaf, and cumin. Sautee until soft and add equal parts water and stock. Add enough liquid to cook the chicken through (about 2 quarts in all). Add the hominy and season with salt. Allow it to come to a simmer. While the soup base is cooking, place the rehydrated guajillo peppers  in a blender with all the liquid and garlic. Process until all is very smooth. Pour the chilie mixture into the soup pot and stir to combine. Adjust seasoning if needed and add water if needed. Allow the soup to come back to a simmer again before serving. Serve with all the garnishes and enjoy!

Happy cooking!
~Ana
Sharing with:

Afternoon Tea

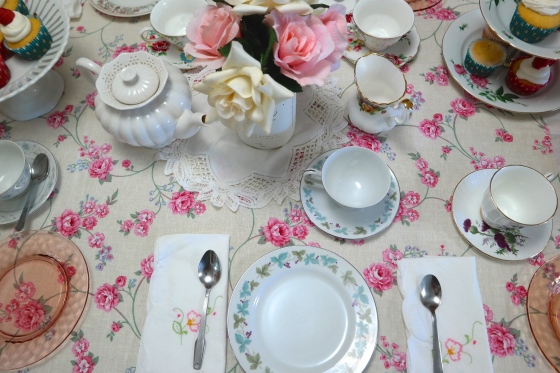
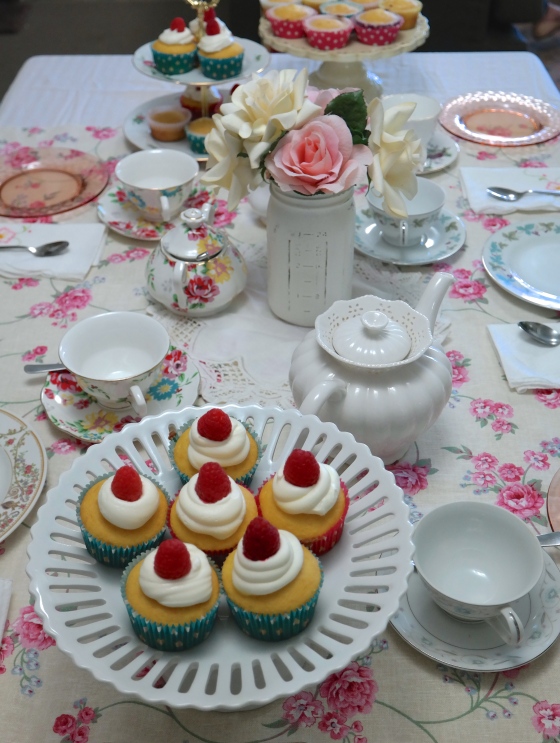
Yesterday, I invited two of my friends over for afternoon tea. I didn’t want anything too overtop but I did want it to be special, especially because one of my friends had never had afternoon tea. I went with a  mismatched themed as I wanted it to be casual yet girly. I set the table with a white tablecloth and put a rose fabric topper made out of a thrifted piece of vintage fabric.

The centerpiece was a painted Mason jar with silk flowers. I would have loved fresh flowers but honestly, fresh flowers never last in my home. They are my cat’s favorite snack! I don’t support his addiction to eating  flowers, so I don’t tempt him by bringing them in. I wonder if they have a support group for people like me? Ha!

I used thrifted cloth napkins with the sweetest embroidered pink flower. Aren’t they so pretty?

Look at these beautiful little treats! I had my daughter help with making them and the decoration.

Afternoon tea is her favorite and she loves to help set up and decorate! A girl after my own heart!

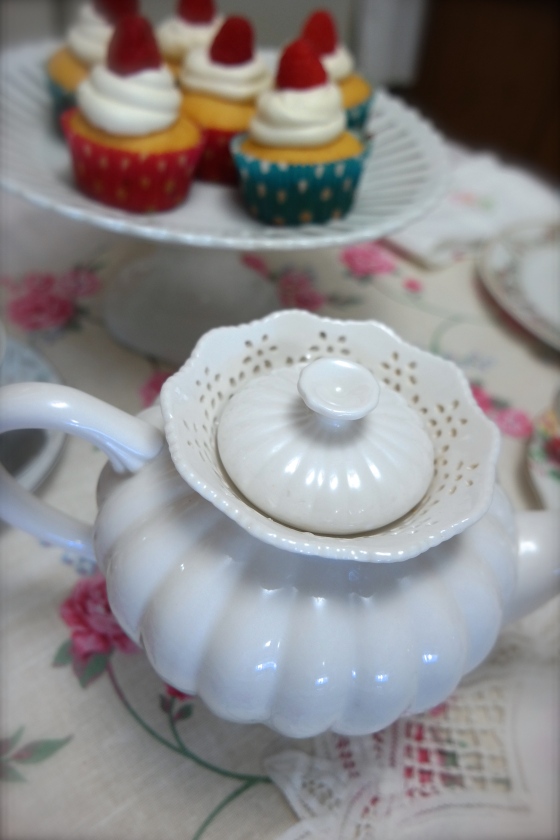
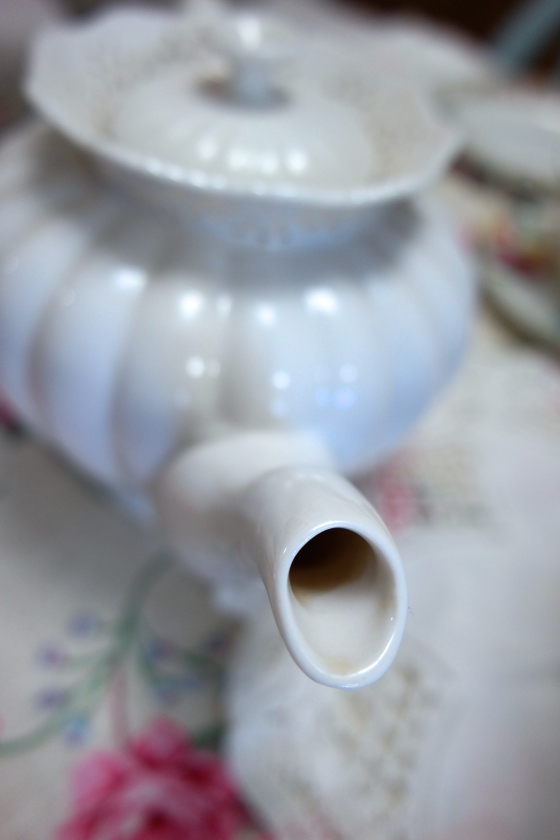
I brought out this beautiful white teapot that my mamma bought for me last year. She got one to match for herself.

The sugar bowl is part of another set that was given to me as a going away present from some friends last summer. I love this set and use almost daily.

I served PG Tips again. I chose this one because both of my friends are coffee girls, so I wanted a full flavor tea.

Recognize this teacup? She has already made an appearance here.

I brought out my favorite creamer in my favorite pattern, Royal Albert’s Old Country Rose. A classic beauty!

I love the light reflecting off my pink depression plates. So pretty!

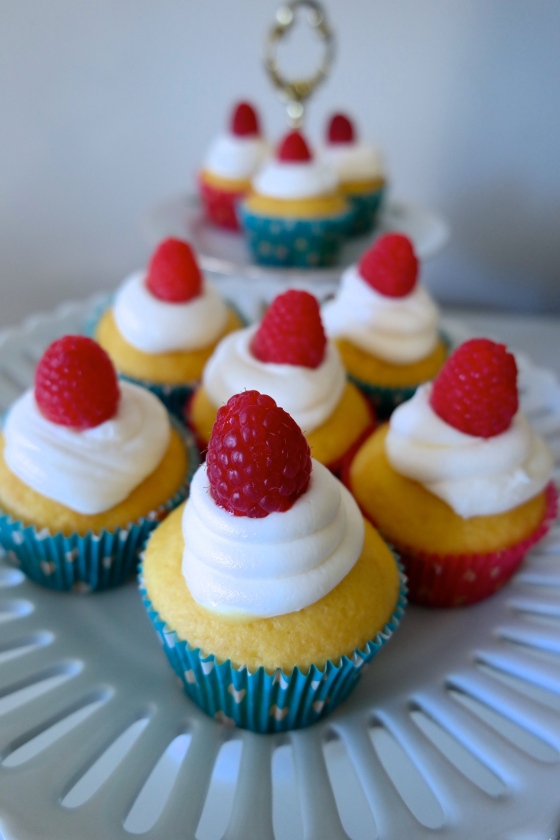
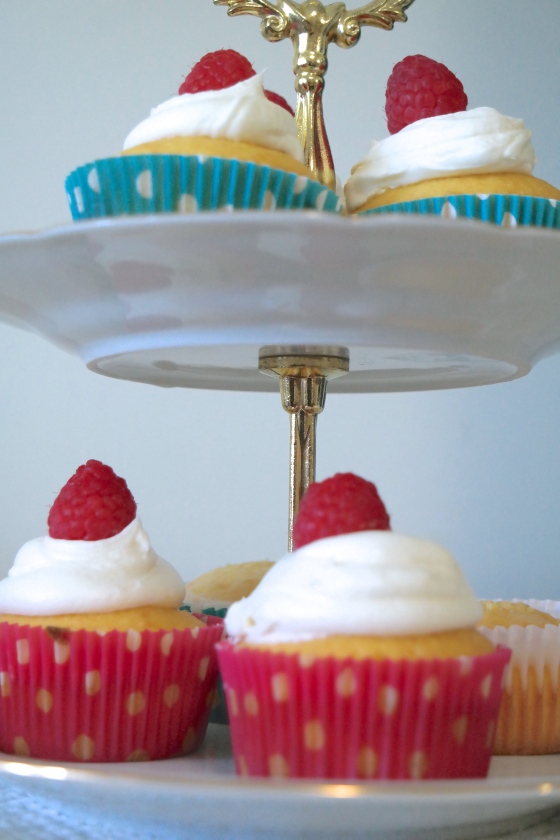
I served Lemon Curd Filled Vanilla Cakes with Vanilla Buttercream.

They were delicious! So moist and tangy from the lemon curd filling, and sweet and creamy from the vanilla buttercream. I love the fresh raspberry on top!


My daughter also made the Lemon Drizzle cakes. She wanted to make the recipe all on her own.

I think she did a great job!

I also served crustless mini quiches with peppers and dill. So scrumptious!

I brought out hats so my friends could wear them. They loved it!

We had a lovely time together chatting, sipping tea, enjoying all the lovely treats, and just having girl time. I asked my one friend who had never had afternoon tea how she liked it, and her answer was, “I can’t wait for the next one!” I think it’s safe to say she loved it!

Isn’t afternoon tea just so wonderful? I think so!

Enjoy!

~Ana

Sharing with:

http://www.loulougirls.com

http://apeekintomyparadise.com

http://theenchantingrose.blogspot.com

http://sandimyyellowdoor.blogspot.com

http://blog.bernideens.com

http://katherinescorner.com

http://jannolson.blogspot.com

http://adventuresofmel.com

http://ivyandelephants.blogspot.com

http://cherishingasweetlife.blogspot.com

http://shabbyartboutique.com

http://romantichome.blogspot.com

http://www.marthasfavorites.com

http://thecharmofhome.blogspot.com

http://www.thededicatedhouse.com

Inspire Me Monday #1

I am starting a series called Inspire Me Monday. I will be showcasing things that have caught my eye or have inspired me through out the weekend. This week’s inspiration came from a walk in our town. We had friends visiting from out of state and we took them out for a walk.

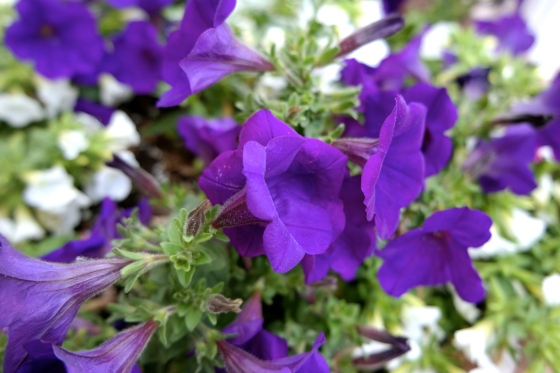
How lovely are these Lupines? So beautifull!

SAMSUNG CSC

I was really blown away by all the shades of purple. I could not help photographing these lovelies. For some reason, flowers always leave me in awestruck wonder. How intricately beautiful they are!

I am so thankful that the Lord created them for our enjoyment.

SAMSUNG CSC

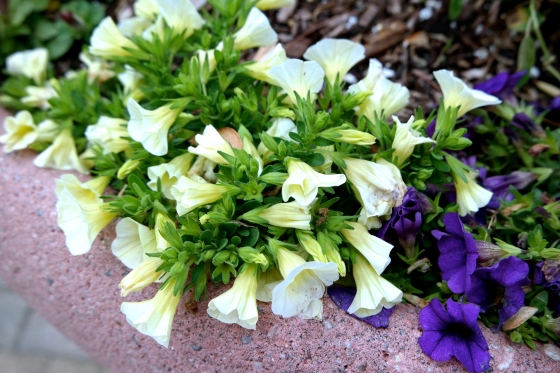
These petunias were in every planter around town. I wish I had taken more pictures, but I was too distracted chit chatting with our friends!

Seeing the petunias blooming makes me feel like Summer is slowly making its glorious entrance. I can’t wait!

What inspired you this week?

~Ana

Sharing with:

http://theenchantingrose.blogspot.com

http://apeekintomyparadise.com

When Life Gives You Lemons…

Lemon Drizzle Cupcakes

Have you ever had one of those days, the kind of day that you are over and done with before it even begins? The kind that hits you smack in the face the moment you open your eyes in the morning? Yes. Those. Well, I just had one of those. Truly, I don’t have many of those kinds of days, but occasionally they happen. And when they do, well, I just have to do something to get out of the funk. So, what do I do? I bake!

When I am down, I bake. When I am happy, I bake. When I am sick, I bake. I bake in my dreams too. Baking always makes me feel better and happier. Oh yeah! Tea always makes me happy too.

Yesterday was one of those funky days. So what did I do? I made Lemon Drizzle cake in cupcake form for our afternoon tea. I can’t even begin to tell you how scrumptious these little sweet and tangy morsels of goodness are! They are moist, tender and delicious, and have just the right amount of zing.

To make these you start out with a basic sponge, which I adapted from a Mary Berry cake recipe. Honestly, not many cakes can compare to this sponge. It is truly the best and it never fails. I have made it countless times, and each time the results are amazing! I chose to make cupcakes at my daughter’s request, but this will also yield a nice size loaf.

Here are some pictures of the process:

You need:

 1 1/2 Cup of Self Rising flour, 3 large eggs, 3/4 Cup of sugar, the zest of 2 lemons,

and 1 1/2 sticks of unsalted butter at room temperature.

Cream all the ingredients together in a mixer bowl until smooth and well incorporated.

This batter is so silky and creamy.

I scoop it into the liners using two spoons. 

I have found that this gives me perfect and uniform cupcakes.

Bake at 350º for about 10 to 15 minutes or until a toothpick inserted in the

center comes out clean.  

While the cake is baking, make the frosting. It should have a flowing consistency.

For the frosting you will need:

1/4 cup of lemon juice (or the juice of the 2 zested lemons), About 1 1/4 cups of powder sugar or as much as it’s needed to reach your desired consistency. Mix together and set it aside.

If too thin, add more sugar, if too thick, add more juice or a splash of cold water. Make as much or as little frosting as you like.

Here they are, freshly out of the oven and cooling.

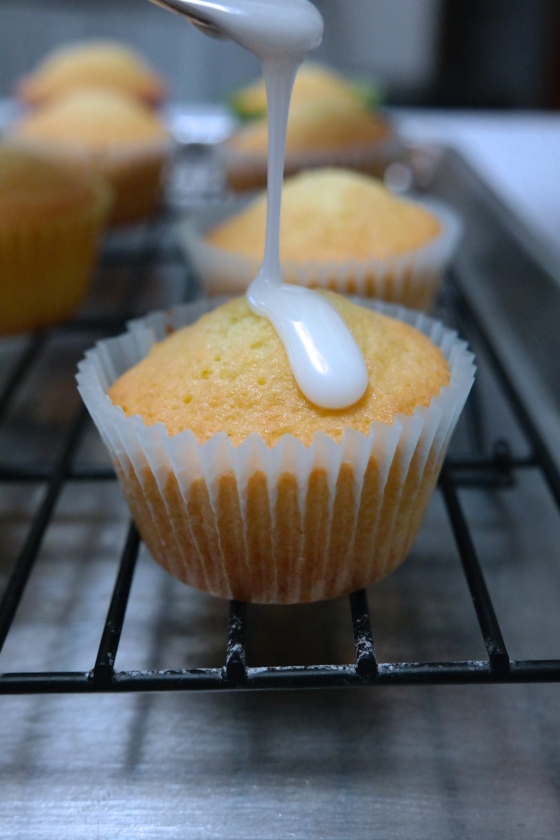
After you take the cakes out of the oven and while they are warm, poke small holes all over and drizzle some frosting.

I purposely left space at the top of the cake and the liner for the frosting. You’ll see what I mean…

See? I want the frosting to pool at the edges and not drip off the sides. I love a good crunchy top! Yum!

Wait a couple of minutes and drizzle the remaining frosting over the cakes. By now the cakes have cooled and the frosting won’t soak into the cake anymore. Instead, you will have a layer of sweet frosting at the top. Let them sit for a few minutes so the frosting can dry. This makes the tops a bit crunchy. My favorite part!

We paired it with a nice cup of PG Tips, our favorite!

And my cup almost runneth over…Ha! Lots of milk, no sugar.

Lemon Drizzle Cupcakes

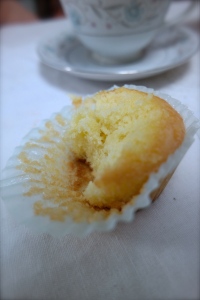
See that tender crumb? Nom nom!! I may or may not have eaten too many of these…

Friends, there will always be ” lemons” in life. And when those sour days come knocking at your door with a  big basket of lemons. Make cake. Lemon Drizzle cake that is… because life is always better with cake and a cup of tea, of course.

Enjoy!

~Ana

Sharing with:

http://jannolson.blogspot.com

http://www.frenchcountrycottage.net

http://thecharmofhome.blogspot.com

http://shabbyartboutique.com

http://romantichome.blogspot.com

http://chiconashoestringdecorating.blogspot.com

http://www.hopeineveryseason.com

http://ivyandelephants.blogspot.com

http://apeekintomyparadise.com

http://sandimyyellowdoor.blogspot.com

http://www.antiquesandteacups.info

http://www.marthasfavorites.com

http://theenchantingrose.blogspot.com

http://www.usscrafty.com

http://www.dwellings-theheartofyourhome.com

http://linda-coastalcharm.blogspot.com

http://www.loulougirls.com

http://apeekintomyparadise.com

Sticky Toffee Pudding

10415713_10203945036376221_4314621356055439185_n

The first time I had sticky toffee pudding was at a tea room in Chattanooga, TN. I had just finished a lovely meal with my friend, Star, at the English Rose downtown and the server recommended it from the menu. I ordered one to share with my daughter, a decision that I regretted almost immediately. One bite in and I was in gastronomical heaven. Wow! the cake was rich, moist, sweet, gooey, delicious. Two bites in and I almost had to fight my daughter to get another bite. So, so good! At that moment, Sticky Toffee Pudding became my number one and most favorite dessert of all time.

As soon as I got home I researched the internet to find the best recipe. Some of the recipes I found were good, but none as delicious as the one I had at the tea room. I had to play around with different recipes until I got the right cake consistency and flavor. I think it took about 3 or 4 times but with every try, the texture and taste improved. I have to warn you though, this cake is highly addictive. I usually make individual cakes because they make a beautiful presentation when served, and also stay moister that way. I can’t say enough great things about this cake. So, If you are ready to have your life changed forever, then keep on reading…

Sticky Toffee Pudding

1 1/2 cups of dates, seedless

1/2 cup, hot boiling water

1 1/2 cups, self rising flour

1 tsp, baking soda, divided

1 tsp, baking powder

2/3 cup, dark brown sugar

6 tbsp, unsalted butter, at room temperature

2 eggs

1 1/2 tsp, vanilla extract

Directions:

 In a bowl, add dates and pour boiling water over them. Add half of the the baking soda (1/2 tsp) and stir to combine. Allow that to sit for about 10 minutes until the dates have soften. While dates are getting soft, preheat the oven to 350º and grease a cupcake/muffin baking tray and set aside. Once dates are soft, use a blender or food processor and blend until smooth.

In a separate bowl, add the flour, baking soda (the remaining 1/2 tsp), and baking powder. In another bowl, cream together the butter and sugar until pale in color. Add the eggs, one at a time until well incorporated. Add the vanilla extract and mix together to combine. Add the date mixture, scrape down the sides of the bowl, and mix again until smooth. Using a spatula, gently fold in the flour mixture until all has been incorporated. Be careful not to over mix. The batter should be smooth and thick. Pour into the prepared muffin tin and bake until a toothpick inserted in the middle comes out clean, about 15-20 minutes, give or take. Allow the cakes to cool for about 5 minutes in the pan before turning them over onto a baking tray or any container with tall sides. Poke holes all over the cakes and pour the toffee sauce. Let them sit in the sauce and reserve some as well for garnish. These cakes last well over a week in the fridge. They also are great make ahead desserts for any tea or dinner party. Serve them warm with custard or vanilla ice cream, and you are in for an adventure! As my daughter would say, “It’s a party in my mouth!” Ha!

Toffee Sauce

1 3/4 cups, dark brown sugar

2 sticks, butter

1/2 cup, heavy cream (or 1/4 milk and 1/4 cream or half and half, which is what I normally use)

a pinch of salt

In a saucepan, on medium heat, combine all the ingredients together and stir. Once all the sugar has melted, allow the sauce to come to a boil and immediately remove from the heat. Pour over the cakes and save some for garnish. This sauce will hold in the fridge for a couple of weeks.

I hope you give this recipe a try. It truly is the best dessert I have ever had. Seriously, nothing beats this pudding…nothing. Oh! guess what’s even better? This is wonderful with a nice cuppa tea. Can life be any better? I think not! Go! Get baking, now!

Enjoy!

~Ana

Sharing with:

http://theenchantingrose.blogspot.com

http://www.loulougirls.com

http://sandimyyellowdoor.blogspot.com

http://www.antiquesandteacups.info

http://blog.bernideens.com

http://thecharmofhome.blogspot.com

http://www.hopeineveryseason.com

http://katherinescorner.com

http://adventuresofmel.com

http://cherishingasweetlife.blogspot.com

http://jannolson.blogspot.com

http://www.marthasfavorites.com

http://www.usscrafty.com

http://apeekintomyparadise.com